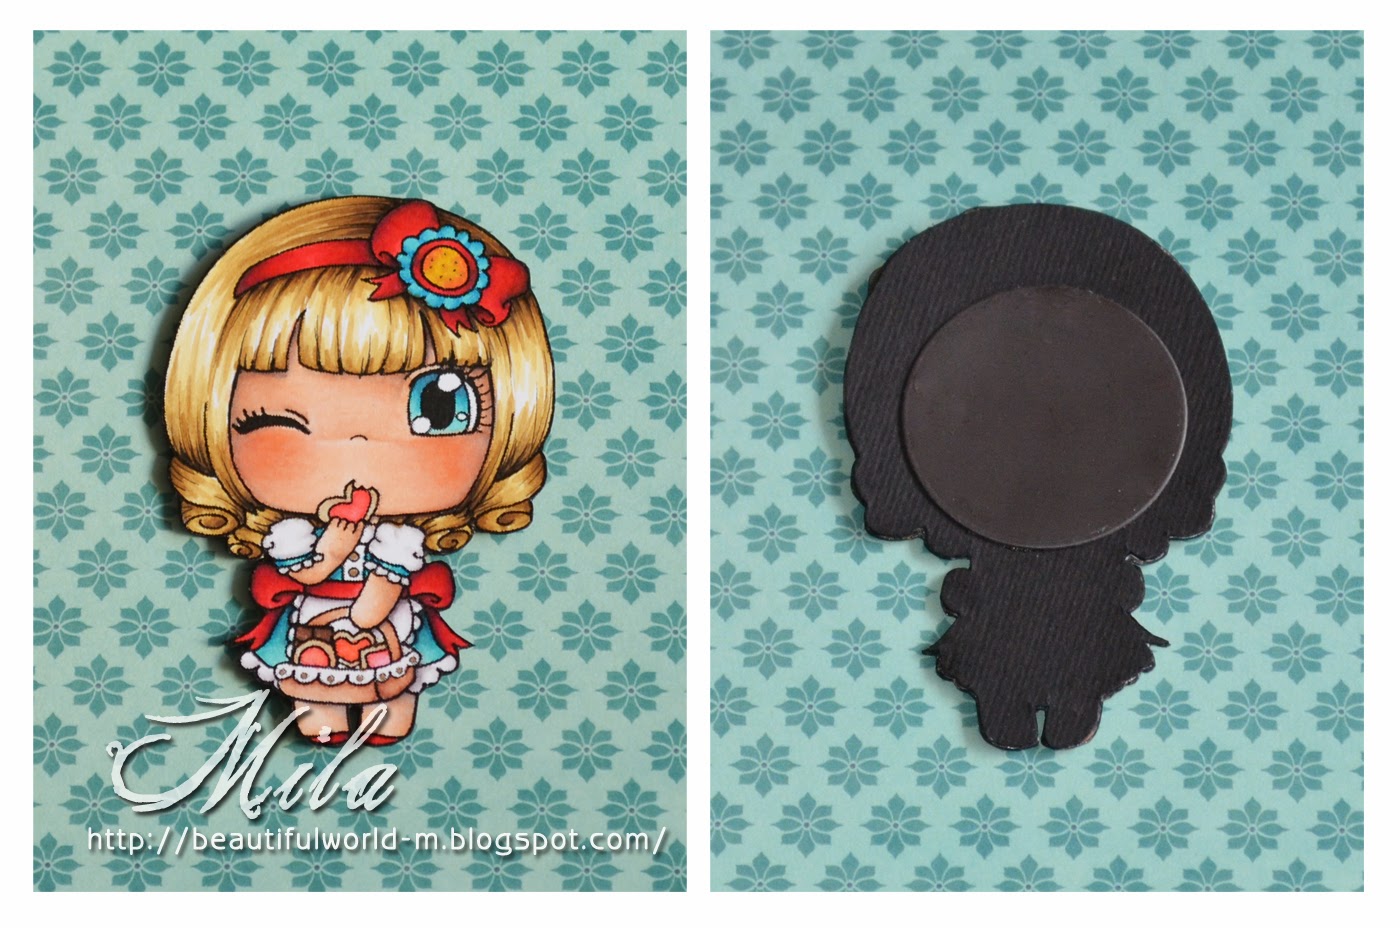
I’m going to show you a really really easy way to make your own unique magnet and turn your fridge into a funny place.
Ето и списък с необходимите ви материали:
- печат по ваш избор / аз лично избрах този защото би бил лесен за изрязване/
- картон за алкохолни маркери - моят е Neenah
- алкохолни маркер Spectrum Noir markers
- лист чер картон за гърбът на нашия магнит
- магнитен лист / като тези които ползвате за съхранение на металните си шаблони/
- лист принтерна хартия A4 / 80g/
- glossy ascent или ultra thick embossing enamel / аз в случея ползвах UTEE /
- нещо за декорация по ваш избор – аз ползвах декоративна камъче
- a digital or clear stamp by choice / I took this one because it's easy to be cut off/
- a sheet of Neenah cardstock
- your favorite Spectrum Noir markers
- a sheet of black cardstock for the back side of our magnet
- a magnet sheet / same as this one that you use for your dies/
- a sheet A4 printable paper / 80g/
- glossy ascent or ultra thick embossing enamel / I used UTEE /
- some decorations or/and embellishments by choice – I put a gem stone on mine
So let’s get started!
First: Print or stamp the chosen image on Neenah cardstock and then do the same on a printable paper and cut that image off . The second one we use like stencil and outline on black cardstock. After this you have to cut off the black shape.
Второто нещо е да отрежем кръг или правоъгълник от магнитния лист, в зависимост от формата на нашата картинка.
Second: Cut off a circle or rectangle, depending on the image shape, from a magnet sheet.
 След като печата е вече оцветен трябва да се изреже по контура много внимателно. И едно малко съветче от мен ако решите да правите малък магнит, то би ви било по-лесно при оцветяването да да не ползвате междинни тонове при блендването.
 Third: Once the image is colored you have to cut it off. I choose this sweety because she is so cute and the shape is easy for cutting off.
Here is my coloring tip for you - If you chose to make a small magnet, it will be easier to color it and you can skip some of the middle shades when blending.
И на края - залепяме черния картон на гърбът на оцветеното изображение, а върху него залепяме и формичката от магнитния лист. Вече сме почти готови, но за да предпазим картинката покриваме повърхността с UTEE /или glossy ascent/, и когато истине /или изсъхне/ може да се помисли за някаква декорация.
Fourth: At the end - glue the black cardstock shape on the back of your colored image and then the magnet circle on the black back.
Your magnet is ready ! The only thing left to be done is to coat the front surface with UTEE /or glossy ascent/ to preserve the colored image. Once the enamel is harden, you can decide how to decorate the magnet.

The colors used on this stamp are:
Skin: TN3, CR2, FS2, FS4, FS6, FS9, BG2, BG4
Hair: GB2, GB8, GB10, BG4
Dress, Shoes & Hair Accessory: DR6, DR7, CR8, CR11, BG1, BG2, BG4, BT4, BT5, BT6, BT7, Blender
Basket & Cookies: EB3, EB5, TN3, CR5, CR7, OR3, BG1, BG2, BG4, Blender
Надявам се това малко уроче да ви е харесало :)
I hope you enjoyed this tutorial and give it a try on your own! It would be a perfect wee gift especially if you make a matching card to go with it


