Страници

събота, 25 февруари 2017 г.

ADFD Blog Hop


 Hi ADFD Friends,


Today is the first day of our ADFD Blog Hop - a celebration of all of the beautiful images Tammy has created over the years. As a special surprise for Tammy, we have a combination of current and former DT members participating in the hop. Her inspiring art and generous heart have touched us all. We want to take a moment to show our gratitude and thank Tammy for the blessings and joys we have received as members of the ADFD DT.

Our theme is “A Collection of ADFD Favorites” - so each DT member’s blog you visit will share something she has created with one of her favorite ADFD images. The hop has hidden prizes - a commenter from each hidden prize stop will win a choice of one image from the ADFD Shop! You won’t know where the prizes are hidden, so be sure to leave a comment at each stop of the Hop! Our Blog Hop will run from 7:00 a.m. eastern standard time on Saturday, February 25, 2017 until 9:00 p.m. eastern standard time on Tuesday, February 27, 2017.

In addition to the Blog Hop, we invite you to share your Favorite ADFD image in the final ADFD Blog Challenge. The linky will stay open until Friday, March 3rd. All prize-winners will be announced on the ADFD Blog on Saturday, March 4, 2017. We hope you will join our celebration of the thousands of images Tammy has created. Rules for the challenge are posted on the right sidebar of the ADFD Blog - the last spot of the stop! Are you ready to HOP?!?

                                                            Alison
                                                    Broni
                                                    Cathy
                                                    Cindy
                                                    Danielle
                                                    Daria
                                                    Jen
                                                   Juliana
                                                   Kathy
                                                            Mila
                                                   Tanja
                                                   Vera
                                             ADFD Blog


I have to confess I'm totally ADFD addicted :) 
I'm so in love with all delicate flowers and fairy tale creatures that Tammy's fantasy create. 
Today I have to choose one of my favorite image but it's seems so hard to me to find only one so I'm sharing with you some of my beloved images оn the cards below.


петък, 10 февруари 2017 г.

Baby Bunny - Pink & Brown Album

Розово бонбонено албумче за първата годинака на малката сладка принцеса Радина, 
зайчето на тати :)


петък, 3 февруари 2017 г.

Love is...


В началото на февруари е време за новото предизвикателство  на Spectrum Noir.Съвсем в унисон с месеца на любовта е и бонус темата този месец - "Love & Friendship" / "Любов и приятелство", имате достатъчно време да се включите до края на месеца :) Необходимо условие за участие е във вашия проект да използвате поне един от продуктите на Spectrum Noir - маркери, мастила, моливи.


The challenge theme for February is "Anything Goes" and
 there is a bonus theme "Love & Friendship"


Here is the list of used materials&
stamp LOTV
mini tag die - Crafter's Companion 
Spectrum Noir markers:
skin:TN3, FS4, FS6, FS9, BG2, CR2
Skirt, shoes & shirt: CR8, CR11, DR5, blender
Cardigan, trousers & hat: BG1, BG2, BG4, Blender
hair:Hair: GB2, GB8, GB10, BG4
grass: BG2, BG4, BG8, DG1, DG2, DG4, CG1, CG2, CG4

сряда, 21 декември 2016 г.

How to make a custom stencil /Как да си направим стенсил

Hi, lovely ladies !

I find out that almost every time when I'm starting a new project need something especially for it. That way came the idea to make my own custom stencil and I'm going to share it with you.

 Here’s the list of what you’ll need to make you stencil:
  • piece of clear or colored acetate sheet / I think colored one is much more easy to use for that purpose/
  • small dies - I choose Diamond Press dies because they are perfrect size
  • fine point permanent marker 
And the rest of the list for the card:
Step 1
You have to create a pattern with your dies- chose the size of the dies and the distance between figures.  
I decide to try small and big pattern. For perfect stencil you'll need to lined the dies shape with marker first. Make it on the back side of the dies because it's easier to stick it with tape.


Here is my acetate sheet ready for work.
Step 2
Start cut the shapes. At the end clear the acetate sheet with cloth impregnated with alcohol to erase all the tracks of the marker.
And here it is your stencil in two really effortless steps!

Make a base for your card by using watercolor techniques.
After my AquaTints dries, lay the mask and make the design you like.
Use white structural paste and color it with AquaTints. That way you may have any color you like.
And after some decoration your complete card will be done !

06, 21, 26, 30, 24 - Bright & Primary sets

I hope you enjoy this and give it a try !
Share a card or other project you make using this tutorial with us on our Facebook page, tag us on Instagram (#spectrumnoir or #spectrumaqua) or on Twitter (@SpectrumNoir)! We’re also on Pinterest so tag us there as well for a chance to get re-pinned to our Colorist Creations board!
Tutorial credit: Mila Popova

събота, 10 декември 2016 г.

Коледна декорация / Christmas Ornament

Този сезон персонализираните и ръчно украсени  топки за елха станаха много актуални.
Предлагам ви моя вариант :) и уроче как да си направим подобна декорация.
И за да не се чудим как да я закачим на елхата и да се вижда само декорираната страна, решението е лесно - украсяваме и двете страни - при мен отзад е посланието, но това зависи само от вас и вашето въображение.
Тадам...м и абсолютно готовата топка !:)

За зимното небе съм използвала мастилата Spectrum Noir AquaTints Inks:
02,07, 08 – Landscape & Primary sets

четвъртък, 1 декември 2016 г.

Ornament the tutorial / Декорация за коледна елха

Hi, lovely ladies !


The Christmas is almost upon us and there is nothing more special than receiving a present that shows attitude and personal touch.
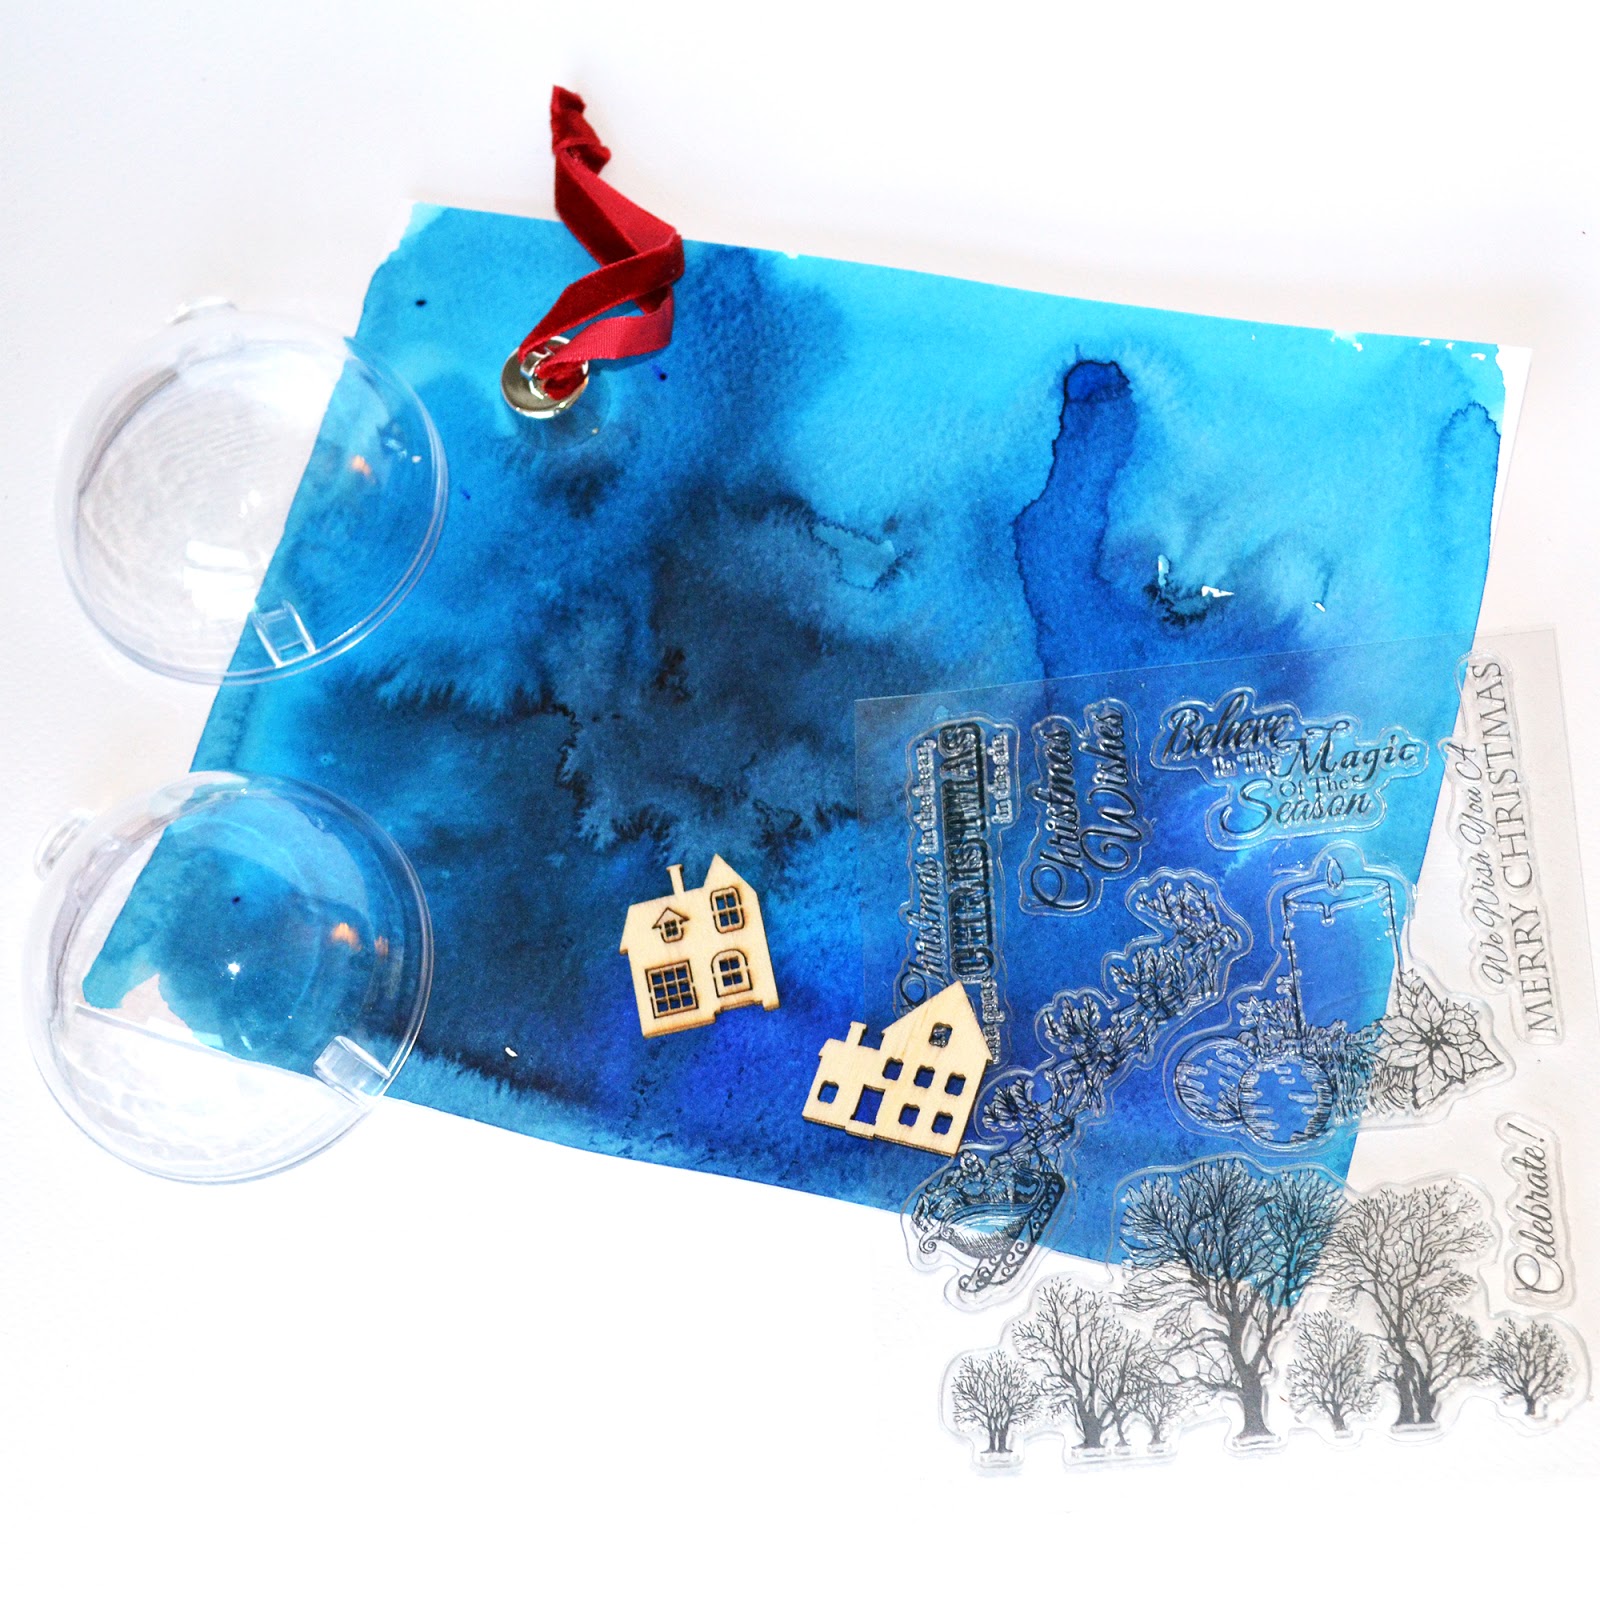
That's why I offer you to make a traditional Christmas tree ornament. The theme is snowy winter night because of how much I like the color combination blue, white and gold. 
It takes less than half an hour and will be much fun.


 Here’s the list of what you’ll need to make you Christmas ornament:
  • Spectrum Noir  AquaTints Inks
  • watercolour cardstock 
  • Plastic Christmas ornament -prefer traditional ball one but there are more shapes
  • some stamps by choise and ink pad - use Crafter's C0mpanion clear stamp set
  • colored cardstock
  • refillable spray bottle, brushes
  • some embellishment, paper flowers & dies by choice 
  • artificial  snow
  • glue
Step 1
I decided to recreate a snowy Christmas night into my ornament and I have chosen dark blues AquaTints Inks and a stamp with trees used as a foreground of my winter sky.  You have to create the background with your AquaTints Inks - I  did choose wet on wet watercolor technique.  

 Step 2
After making the background you need to outline the template that was into the ball.  If there's no template, outline the half of the ornament but in this case cut inside the shape to be sure the contour will fit into the plastic ornament. 

Step 3
Once you outline the shape continue and stamp the background. Make some snowy winter sky and trees. I wanted my winter night to be more realistic, so I stuck the warm yellow cardstock on the back of the wooden house. This way it looks like there's light through the windows.


Step 4
Decorate the second background. Use it for the back side of your ornament because it has to be perfect on both sides. You can use some sentiment like me or even put a picture of your sweetheart or a baby etc.


Step 5 
In the end assemble the Christmas ornament. You could insert some artificial snow or ice.
Add some embellishment for example I put paper poinsettia and a few tiny cones. 

02,07, 08 - Landscape & Primary sets

I hope you enjoy this and give it a try !
Share a project you make using this tutorial with us on our Facebook page, tag us on Instagram (#spectrumnoir or #spectrumaqua) or on Twitter (@SpectrumNoir)! We’re also on Pinterest so tag us there as well for a chance to get re-pinned to our Colorist Creations board!
Tutorial credit: Mila Popova


вторник, 15 ноември 2016 г.

Colorista - Exquisite Florals


Здравейте, момичета
Представям ви картичка с извадка от блокчета за оцветяване на Crafter's Companian - Colorista- Exquisite Florals. Това са така наречените блокчета за оцветяване за възрастни - доста релаксиращо занимание не мислите ли :)


Картичката е оцветена с маслените моливи на Spectrum Noir:
The card was colored with Spectrum Noir Colourblend pencils :
14, 19, 21, 23, 30, 31, 38, 43, 44, 45, 46, 48, 49, 54, 57, 62, 72, 73, 83, 94, 108