Страници

Показват се публикациите с етикет tutorial SN. Показване на всички публикации

сряда, 21 декември 2016 г.

How to make a custom stencil /Как да си направим стенсил

Hi, lovely ladies !

I find out that almost every time when I'm starting a new project need something especially for it. That way came the idea to make my own custom stencil and I'm going to share it with you.

 Here’s the list of what you’ll need to make you stencil:
  • piece of clear or colored acetate sheet / I think colored one is much more easy to use for that purpose/
  • small dies - I choose Diamond Press dies because they are perfrect size
  • fine point permanent marker 
And the rest of the list for the card:
Step 1
You have to create a pattern with your dies- chose the size of the dies and the distance between figures.  
I decide to try small and big pattern. For perfect stencil you'll need to lined the dies shape with marker first. Make it on the back side of the dies because it's easier to stick it with tape.


Here is my acetate sheet ready for work.
Step 2
Start cut the shapes. At the end clear the acetate sheet with cloth impregnated with alcohol to erase all the tracks of the marker.
And here it is your stencil in two really effortless steps!

Make a base for your card by using watercolor techniques.
After my AquaTints dries, lay the mask and make the design you like.
Use white structural paste and color it with AquaTints. That way you may have any color you like.
And after some decoration your complete card will be done !

06, 21, 26, 30, 24 - Bright & Primary sets

I hope you enjoy this and give it a try !
Share a card or other project you make using this tutorial with us on our Facebook page, tag us on Instagram (#spectrumnoir or #spectrumaqua) or on Twitter (@SpectrumNoir)! We’re also on Pinterest so tag us there as well for a chance to get re-pinned to our Colorist Creations board!
Tutorial credit: Mila Popova

четвъртък, 1 декември 2016 г.

Ornament the tutorial / Декорация за коледна елха

Hi, lovely ladies !


The Christmas is almost upon us and there is nothing more special than receiving a present that shows attitude and personal touch.
That's why I offer you to make a traditional Christmas tree ornament. The theme is snowy winter night because of how much I like the color combination blue, white and gold. 
It takes less than half an hour and will be much fun.


 Here’s the list of what you’ll need to make you Christmas ornament:
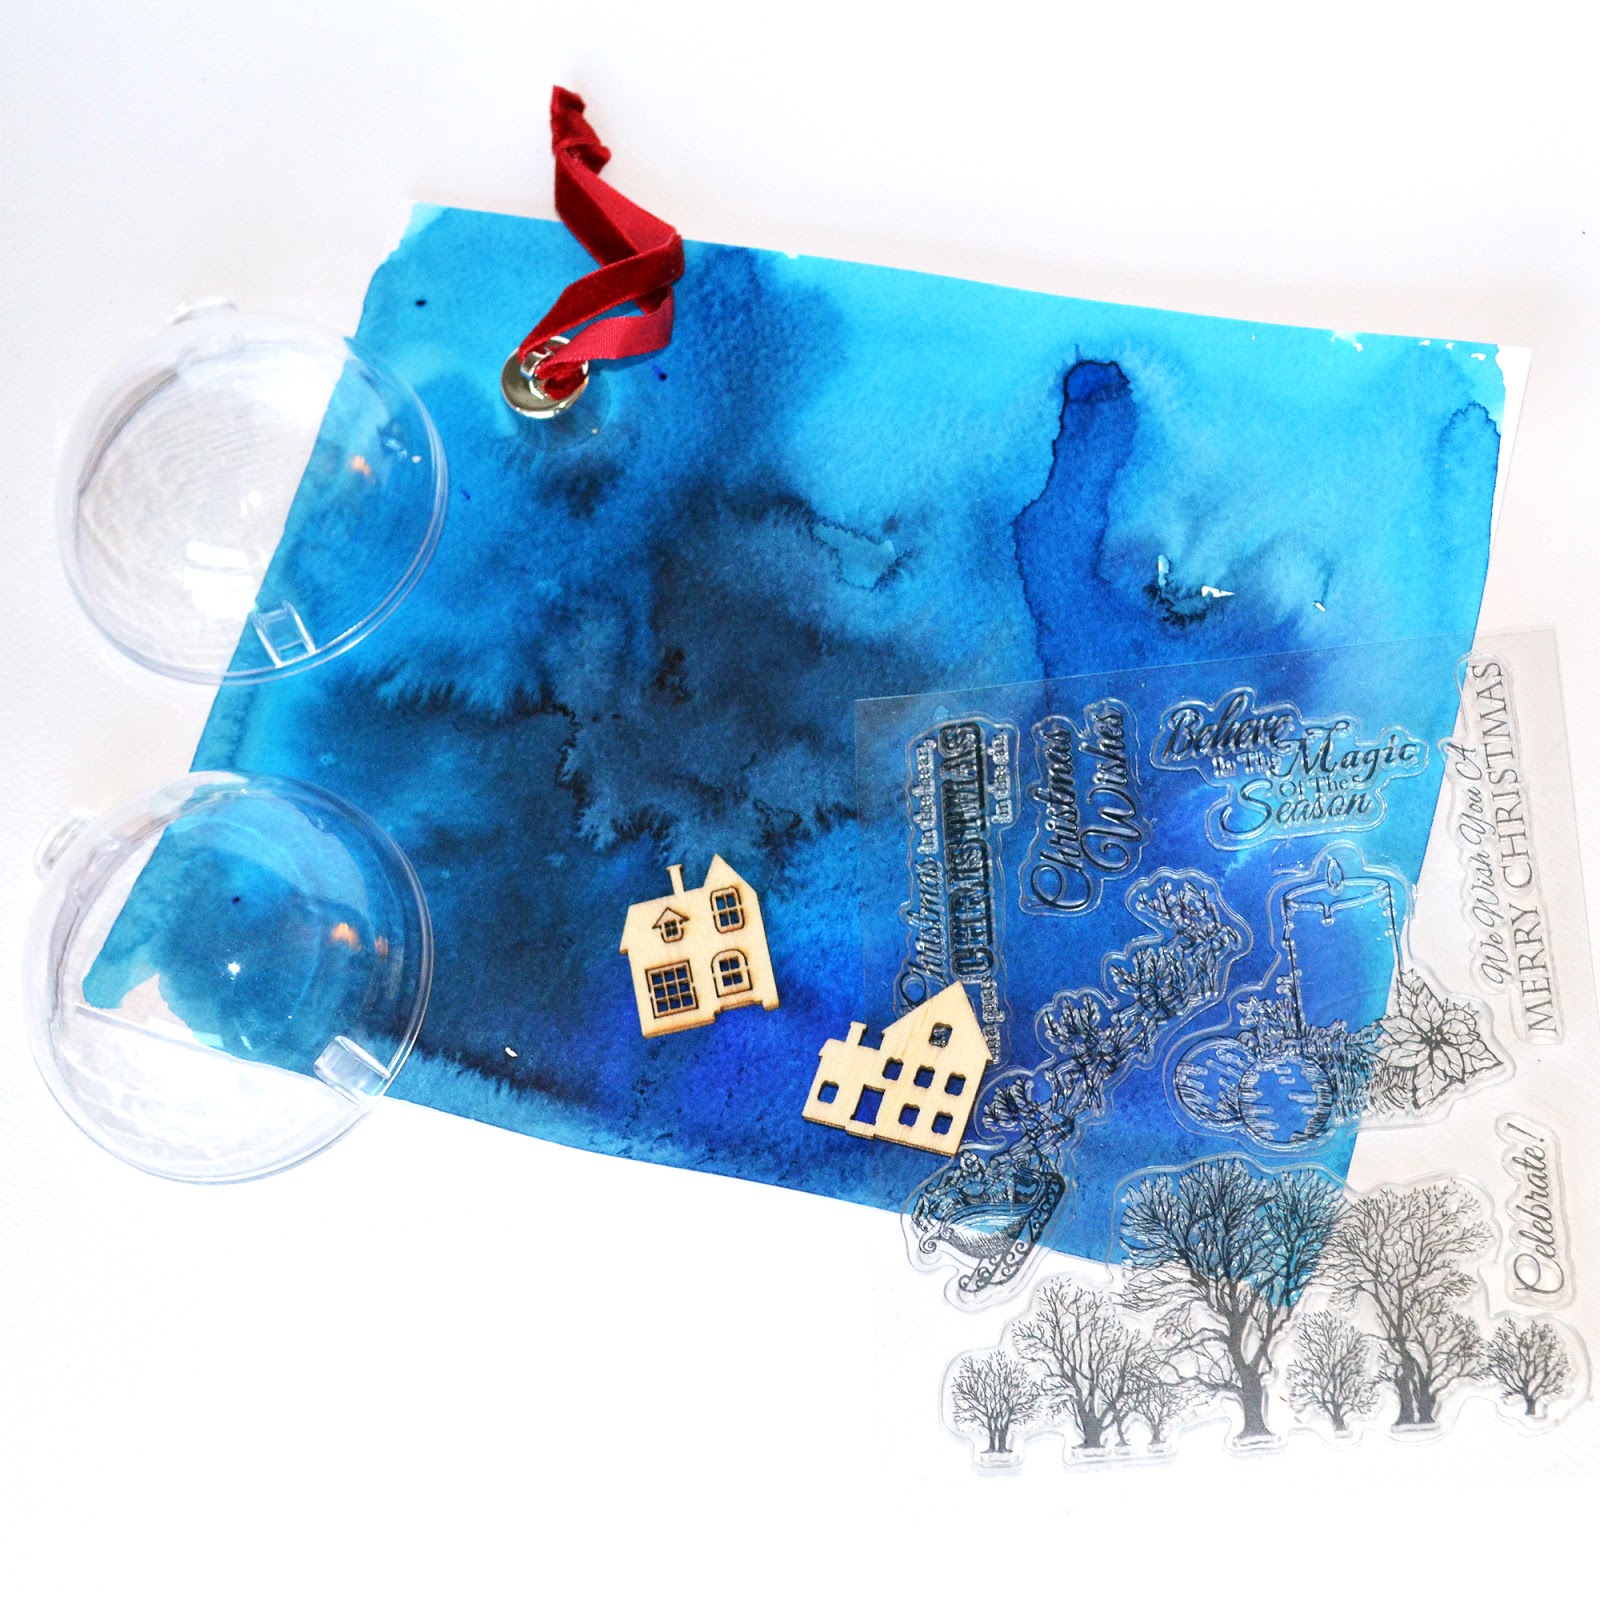
  • Spectrum Noir  AquaTints Inks
  • watercolour cardstock 
  • Plastic Christmas ornament -prefer traditional ball one but there are more shapes
  • some stamps by choise and ink pad - use Crafter's C0mpanion clear stamp set
  • colored cardstock
  • refillable spray bottle, brushes
  • some embellishment, paper flowers & dies by choice 
  • artificial  snow
  • glue
Step 1
I decided to recreate a snowy Christmas night into my ornament and I have chosen dark blues AquaTints Inks and a stamp with trees used as a foreground of my winter sky.  You have to create the background with your AquaTints Inks - I  did choose wet on wet watercolor technique.  

 Step 2
After making the background you need to outline the template that was into the ball.  If there's no template, outline the half of the ornament but in this case cut inside the shape to be sure the contour will fit into the plastic ornament. 

Step 3
Once you outline the shape continue and stamp the background. Make some snowy winter sky and trees. I wanted my winter night to be more realistic, so I stuck the warm yellow cardstock on the back of the wooden house. This way it looks like there's light through the windows.


Step 4
Decorate the second background. Use it for the back side of your ornament because it has to be perfect on both sides. You can use some sentiment like me or even put a picture of your sweetheart or a baby etc.


Step 5 
In the end assemble the Christmas ornament. You could insert some artificial snow or ice.
Add some embellishment for example I put paper poinsettia and a few tiny cones

02,07, 08 - Landscape & Primary sets

I hope you enjoy this and give it a try !
Share a project you make using this tutorial with us on our Facebook page, tag us on Instagram (#spectrumnoir or #spectrumaqua) or on Twitter (@SpectrumNoir)! We’re also on Pinterest so tag us there as well for a chance to get re-pinned to our Colorist Creations board!
Tutorial credit: Mila Popova


четвъртък, 10 март 2016 г.

For My Sweet Little Princess- Decoupage on Textile / Декупаж върху текстил

Hi, lovely ladies !
I would like to share with you a step by step decoupage on textile tutorial that I made with my favorite  Spectrum Noir Markers . I’m going to show you a really cute and easy to made personalized gift. A few weeks ago, I made a common white bodysuit for my baby girl looks so special transferring an image on it.

Здравейте, момичета !
Искам да ви споделя уроче, което направих за декопаж върху текстил и идея за много симпатично и персонализирано подаръче. Преди няколко седмици превърнах едно обикновенно бяло боди за дъщеря ми в нещо съвсем различно като трансферирах картинка картинка оцветена с Spectrum Noir Markers на него.
Here’s the list of what you’ll need:
  • a white or light color cloth / I use white short sleeve bodysuit – it’s  depends on the size of your stamp and colors you choose
  • a rubber / clear stamp by choice  (I choose this one because it’s a fairy tale one )
  • ink pad– I use StazOn
  • a sheet A4 printable paper or white cardstock
  • white tissue paper
  • decoupage vanish & glue or textile glue
  • brush for the glue

  • some decorations as desired
На снимката са всички материали, които съм използвала.Аз печатам със StazOn, знам че е не типично за алкохолните маркери, но според мен се получават доста по-добри изображения и контури с него, пък дори и с алкохолни маркери.
Тук може да видите, че оцветявам на обратната страна на тишу хартията.
Картинката вече е залепена на текстилната повърхност.
И за финиш, след добре изсъхнала картинка съм нанесла и още един слой декупажно лепило.

You can find the full step by step tutorial on Spectrum Noir page.
Пълното описание стъпка по стъпка може да видите на сайте на Spectrum Noir.

Here is the color list:
Skin: TN3, TN5, FS4, FS6, FS9, BG2, BG6, CR3, CR5
Hair: EB1, EB2, EB7, BG2, BG6, True Black, DG4, CG3, CG4, GB3, GB7, GB9,CT3, Blender
Dress: BT2, BT3, BT4, BT6, BT9, TB9, BG2, BG6, GB3, GB7, GB9,CT3, Blender, True Black

Надявам се да ви хареса и да пробвате и вие :)

събота, 2 май 2015 г.

Coloring Transparent Wings/ Оцветяване на прозрачни крила


We all love coloring fairy creature. That's the reason why I decided to show you a step by step coloring tutorial on how to create a transparent fairy wings and make your image much more realistic.

I choose this very detail digital stamp by Sara Burrier because it's perfect to show you how to do a transparent wings. You'll notice that artist draw the wings looks like they are transparent too.

First of all, you have to color your image and leave the wings completely blank.
The most important rule that you need to follow when you are coloring something transparent especially wings is that you only color inside the transparent area and have to leave a white gap close to the border of it because the white line will make it looks like it's shining and the transparent objects always have some kind of  the sheen to them.

I mark with a pencil the imaginary lines of  the fairy hair which is behind because if my wings are transparent I have to see the hair too. I need to add some details to the hair to match with other side of the image so I'm going to use lighter hair colors - GB2, Blender and darker ones - GB8, BG4 to define the hair a little bit more. Remember this part of the hair must be lighter then the other one.
Once the hair is ready it's time to start with the wings- the one that's over the hair and do over the area that want to looks like a transparent and do not color all the way to the border of the wing. I add some details like I did with the hair and gently blend the wing colors and hair ones.
I do the same thing with the other one but now I have two wings which are overlapping each other so I need to differentiate which one is standing in front of the other. The overlapping part of my fairy wings have to be darker just because they are transparent and the other thing that I can do is to add a shadow around the front one.

The here is the complete color list:
Skin: TN3, TN7, FS2, FS4, FS6, FS9, BG4
Hair: GB2, GB4, GB8, GB9, GB10, EB6, BG4
Dress: BG2, BG3, BT6, BT7, GT1, GT2, GT3, DG3, CG3, CG4
Hearts: PP3, CR4, CR6, BG2, BG4
Wings: BG1, BG2, BG4, GT1, GT3, BT7, Blender

I hope you enjoyed this fairy coloring tutorial !


´the part of the frontal one that overlap the back one is .
To make it clear  which oare overlapping each other

make it clear /
Now the two are already colored.

I need to make it clear which one is frontal because they are two wings overlapping each other.

 We are losing a little bit of definition because we have two wings which are overlapping each other so we have to workout which wing is standing  in front of the other s owe can do a shadow around the wing.


Coloring Transparent Wings

We all love coloring fairy creature. That’s the reason why I decided to show you a step by step coloring tutorial on how to make a transparent fairy wings and  your image will become much more realistic.
1 SNI choose this very detail digital stamp by Sara Burrier because it perfectly fits to my idea. You’ll notice that artist draw very detailеd wings that look like they are transparent.
First of all, you have to color your image and leave the wings completely blank.
2 SNThe most important rule that you need to follow when you are coloring something transparent especially wings is that you only color inside the transparent area and have to leave a white gap close to the border of it because the white line will make it looks like it’s shining and the transparent objects always have some kind of  the sheen to them.
I mark with a pencil the imaginary lines of  the fairy hair which is behind because if my wings are transparent I have to see the hair too. I need to add some details to the hair to match with other side of the image so I’m going to use lighter hair colors – GB2, Blender and darker ones – GB8, BG4 to define the hair a little bit more. Remember this part of the hair must be lighter then the other one.3 SNOnce the hair is ready it’s time to start with the wings- the one that’s over the hair and do over the area that want to looks like a transparent. I do not color again all the way to the border of the wing and add some details like I did with the hair, gently blend the wing colors and hair ones.4 SNI do the same thing with the other one but now I have two wings which are overlapping each other so I need to differentiate which one is standing in front of the other. The overlapping part of my fairy wings have to be darker just because they are transparent and the other thing that I can do is to add a shadow around the front one.
5 SN
Finally, my image is ready and I can put it on a card or another paper project!

понеделник, 22 декември 2014 г.

Коледна свещ / Christmas candle

Днес ще ви покажа нещо забавно - предложение за Коледа :)
Изключително лесно за изпълнение и в същото време оригинален вариант за подарък. Лично аз много харесвам сладурските печати на Sugar Nellie и именно един от тях ползвах за този проект. На сайта на Spectrum Noir може да намерите мойте подробни указания стъпка по стъпка как и да се възползвате от тази идея :)

You can find a whole step by step tutorial of this Christmas candle on the Spectrum Noir site
Оцветяването е с маркери Spectrum Noir, а ето и използваните цветове.
The colors used on this stamp are:
Skin: CR1,CR3, FS2, FS4, FS6, FS9, BG2
Hair: TN3, TN5, EB4
Cloths: DR7, CR8, CR11,GB2, CT3, CT4,  BG1, BG2, BG4, BT5, BT6, BT9, Blender
Basket & Cookies: EB3, EB5, TN3, CR5, CR7, OR3, BG1, BG2, BG4, Blender